Have you ever wanted to make fresh pasta at home? I know I have! And this weekend I was finally able to. The pasta dough was very easy to throw together, and only required two ingredients that are commonly found in most kitchens. The most challenging part for me was cutting and shaping the pasta. It was occasionally frustrating, and a little time consuming (so beware), but in the end I was able to expand my culinary skills by learning how to create different pasta shapes by hand.
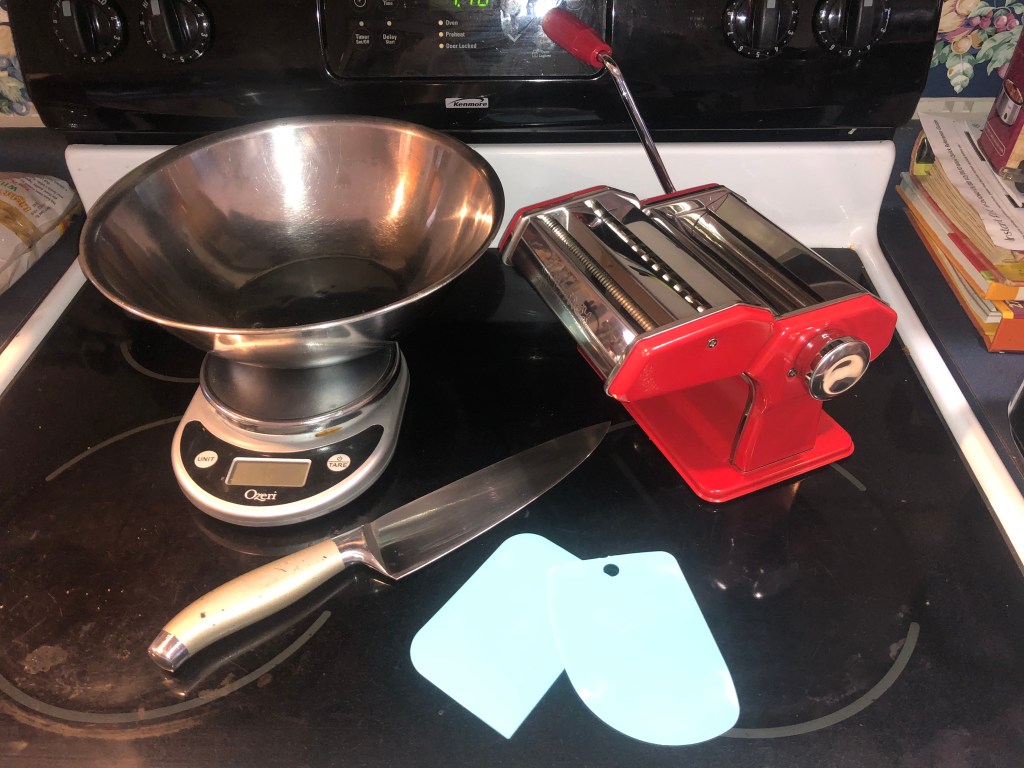
Pasta can be prepared without the use of very many tools. In fact, basic pasta making only requires a smooth surface, a rolling pin and a knife. A smooth surface is needed throughout the entire process, as it provides a spot to mix, knead, roll out and cut the pasta dough. A rolling pin flattens out the dough to whatever thickness is needed, which then prepares the dough to be cut by a knife into many different pasta shapes. But, a typical Italian would most likely use a few more items, including a wooden board (or wooden table), a kitchen scale, a dough scraper, and a pastry cutter. A wooden surface is better than one made of metal or granite because the dough is less likely to stick to wood. If the dough is too wet and sticky, then a dough scraper can come in handy to remove the dough from the surface. A kitchen scale could prevent wet and sticky dough by providing a more accurate measurement of the ingredients, resulting in the perfect pasta dough. Finally, a pastry cutter serves the same purpose as a knife, but often has a wavy blade that can give pasta a different look and shape. They are all very easy to acquire (if you don’t already have them in your kitchen), and they are all very easy to use. These main six tools provide a starting point for the process of pasta making, but the process can be made easier and less time consuming by using additional tools or equipment.
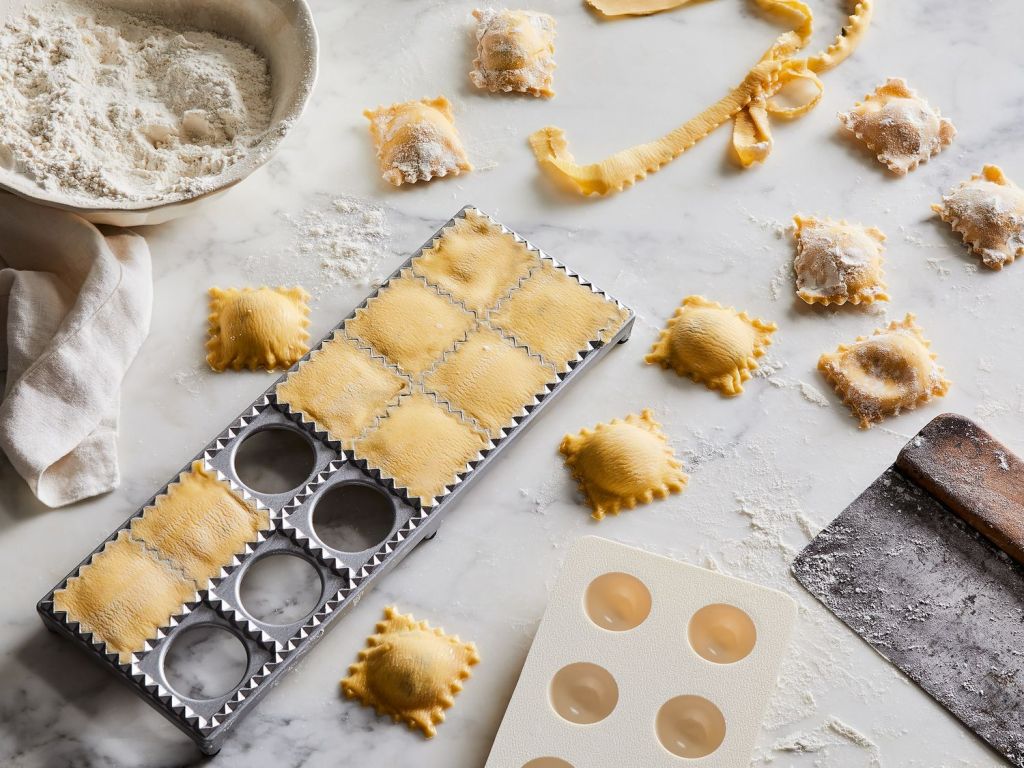
Ravioli makers are a lifesaver if you are a beginner at pasta making. Typically, ravioli is made by rolling dough into thin sheets, then placing a dollop of filing onto one side. After moistening the dough with water, the other half of the sheet is folded over the filling, and then pressed together around each dollop. Finally, the now ravioli is cut into squares. Making ravioli by hand is not a very difficult process, but it can take time for someone to perfect and complete in a reasonable amount of time. This is when a tool that makes the process easier is welcomed. To use a ravioli maker the dough still needs to be rolled into thin sheets. Then, one sheet of dough is placed on the base of the ravioli maker, which is very similar to an ice tray. A plastic mold is gently pressed on the base to make small pockets in the dough. Next, the filling is added to the pockets, and another sheet of dough is added on top. A rolling pin is used to flatten out the dough until the ridges of the base are visible. Finally, the base can be flipped over and the dough can either be pulled apart or cut into individual pieces. Basically, if someone is not familiar with making ravioli then a ravioli maker can simplify the somewhat challenging process, and produce a more appealing, uniform ravioli.
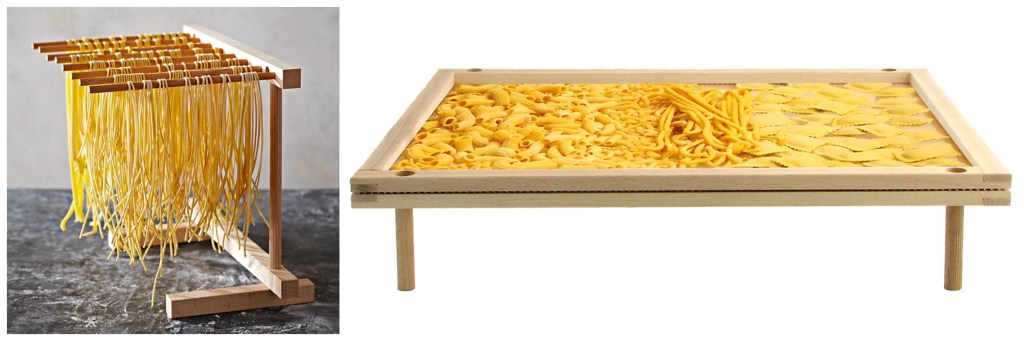
Drying racks and drying nets can be very helpful after pasta is cut. A drying rack normally holds long types of pasta, and a drying net is normally used for filled pastas. Once the pasta is cut, it would be placed onto either of these tools to dry slightly, and develop a “skin” on the exterior. Both of these are very helpful by preventing pasta from sticking to itself or all together.
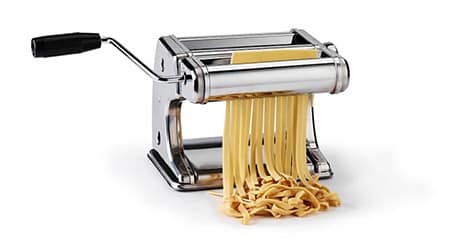
What would you say is the most well known tool used in the pasta making process? A pasta maker! Which is often complete with smooth rollers on one side to flatten the dough into sheets, and different style pasta cutters on the other side. The two sides to the pasta maker can simplify two completely different steps. Instead of using a rolling pin to flatten out the dough, the smooth rollers can be set to a range of different thicknesses, which can easily create sheets of dough almost in one pass. The different style pasta cutters on the opposite side typically cut fettuccine and thin spaghetti. One pass with a sheet of dough can cut about a handful of pasta. A pasta maker simplifies preparing fresh pasta by having the ability to complete two different steps in one tool, and doing so in a less amount of time.
For other tools that could make preparing fresh pasta easier, check out this article: https://nymag.com/strategist/article/essential-pasta-making-tools-gear.html!
When preparing my fresh pasta this past weekend, I used a few of the tools I mentioned earlier. The whole process was completed on a smooth wooden surface, my kitchen table. First, I used a kitchen scale to measure my ingredients. Then, I had to use a dough scraper to help mix my ingredients together. I also used a knife to cut my pasta dough into smaller sections, and a pastry cutter to make a certain style of pasta. The last and best tool I used was a pasta maker (I bought one on Amazon just for this).
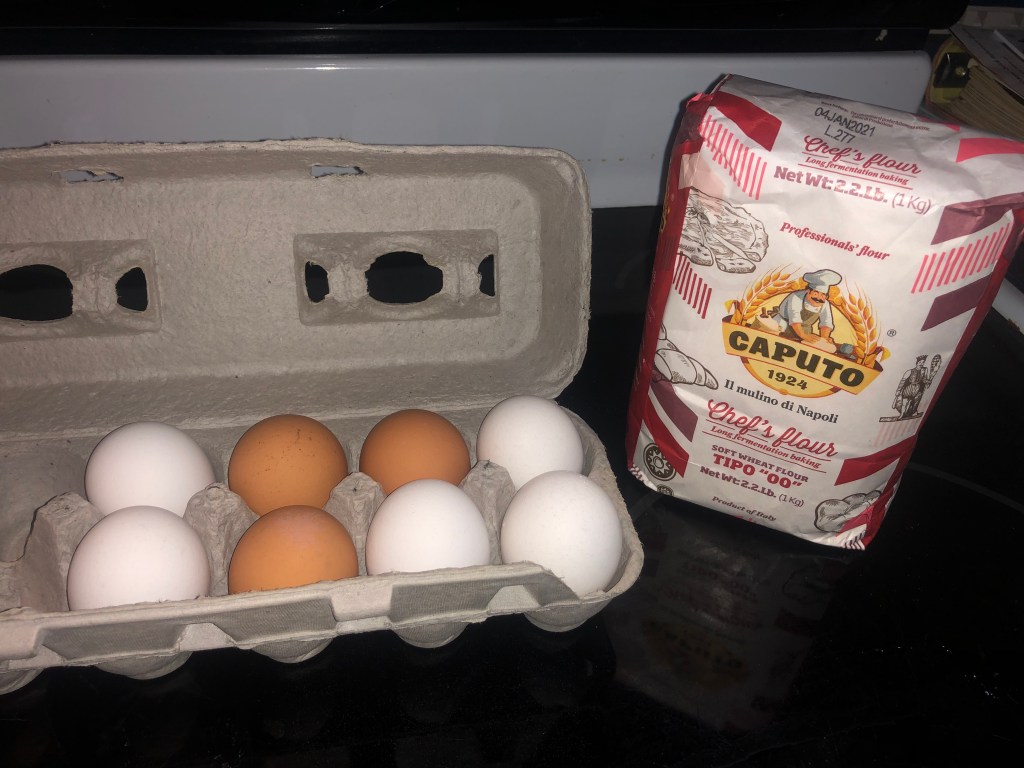
Making the pasta dough was the easiest part of my whole day because all it entailed was mixing flour and eggs. I spent quite a bit of time online looking for a pasta recipe. They were all fairly similar, except some had an addition of olive oil and salt. At first I unsure of what recipe to actually follow, until I remembered the pasta shop I visited in Italy, and they only used two ingredients: flour and eggs. I was even able to buy 00 flour (another Amazon buy), which is a very common type of flour used in Italy. The recipe for pasta is only 400 grams of flour and 4 eggs (each at least 70 grams). I decided to double this recipe, so I could freeze it and enjoy it another day.
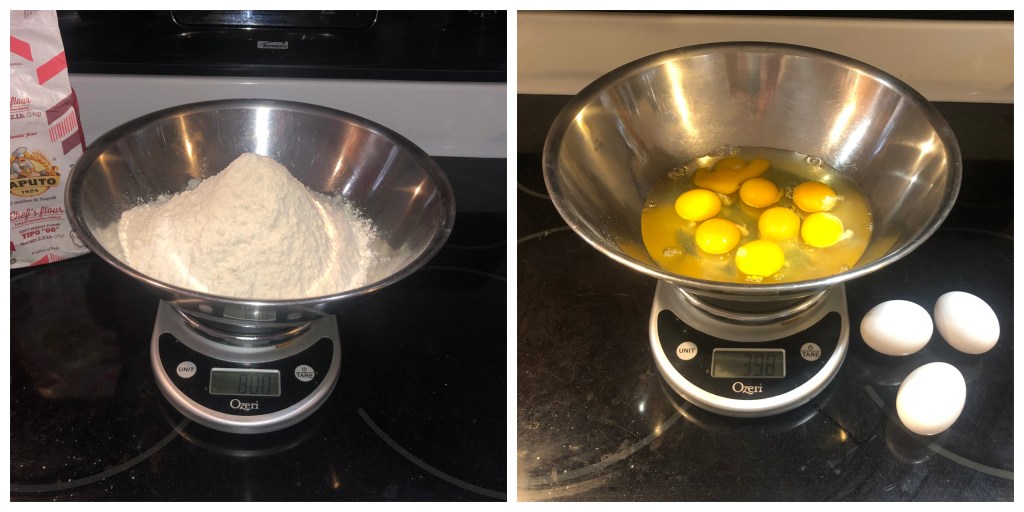
First, I used my kitchen scale and measured 800 grams of flour (normally 400 grams but I am doubling the recipe). After, I dumped the flour into a nice pile onto my kitchen table, and started cracking eggs. Each egg should be around 70 grams, but the eggs I used were only around 50 grams, so I had to use 11 eggs total.
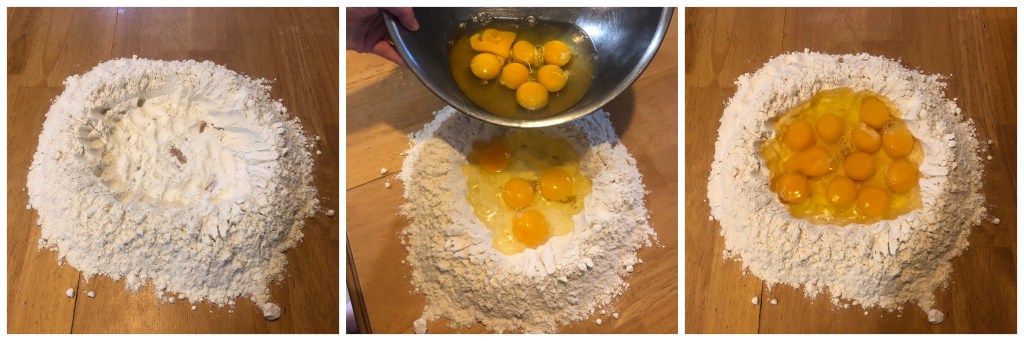
Now back to the pile of flour. Instead of mixing the dough in a bowl, you typically mix it on the table. To do this, you have to create a “well” in the pile of flour for the eggs. Once the eggs are in the “well”, you have to slowly begin incorporating everything together. For me, this was extremely messy, and I was getting egg everywhere. But, I used the dough scraper and everything started slowly coming together.
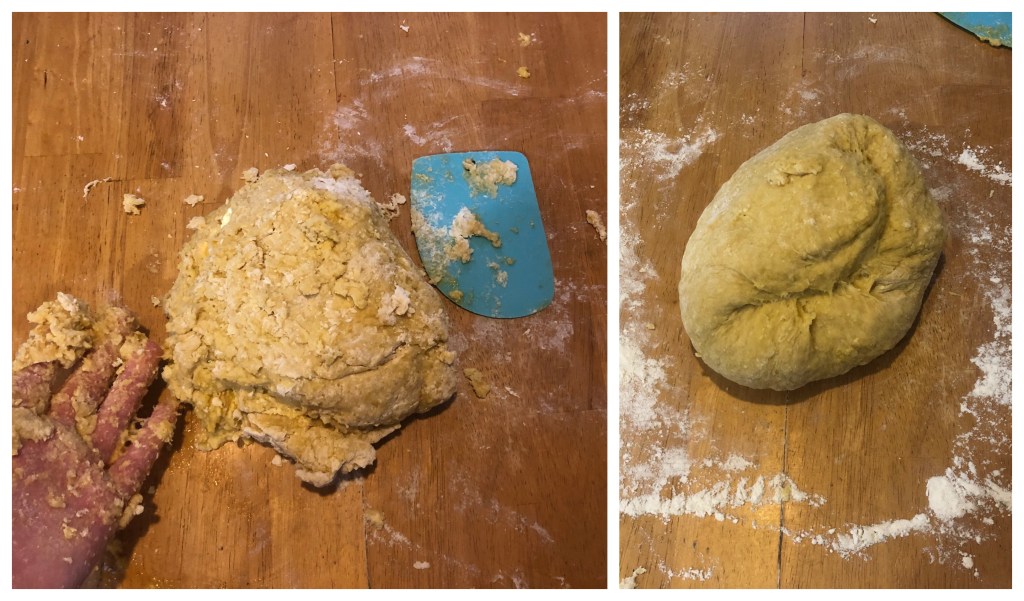
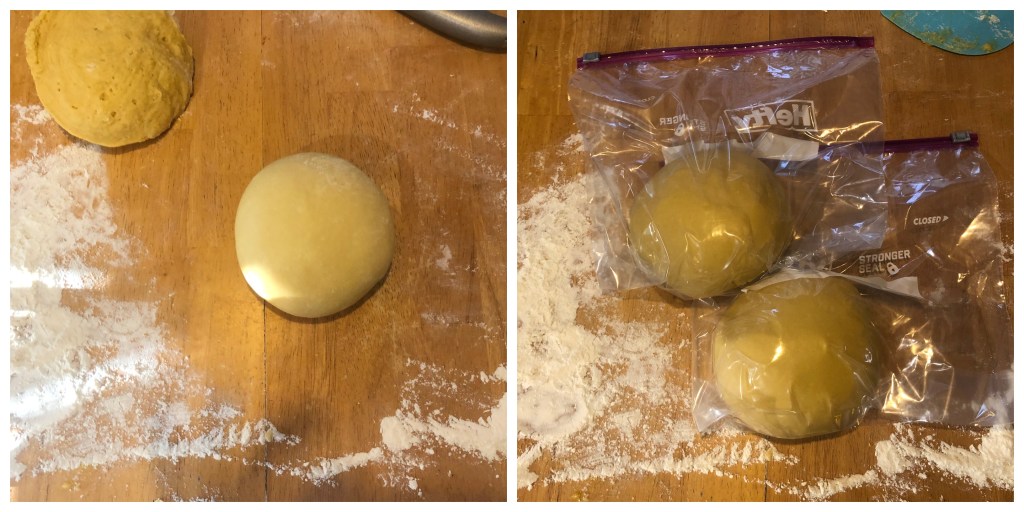
I decided to split my dough into two sections before kneading it, and I believe that made the dough slightly easier to work with. After kneading each half for roughly ten minutes, I placed both halves into a plastic bag, and let it rest for 15-30 minutes.
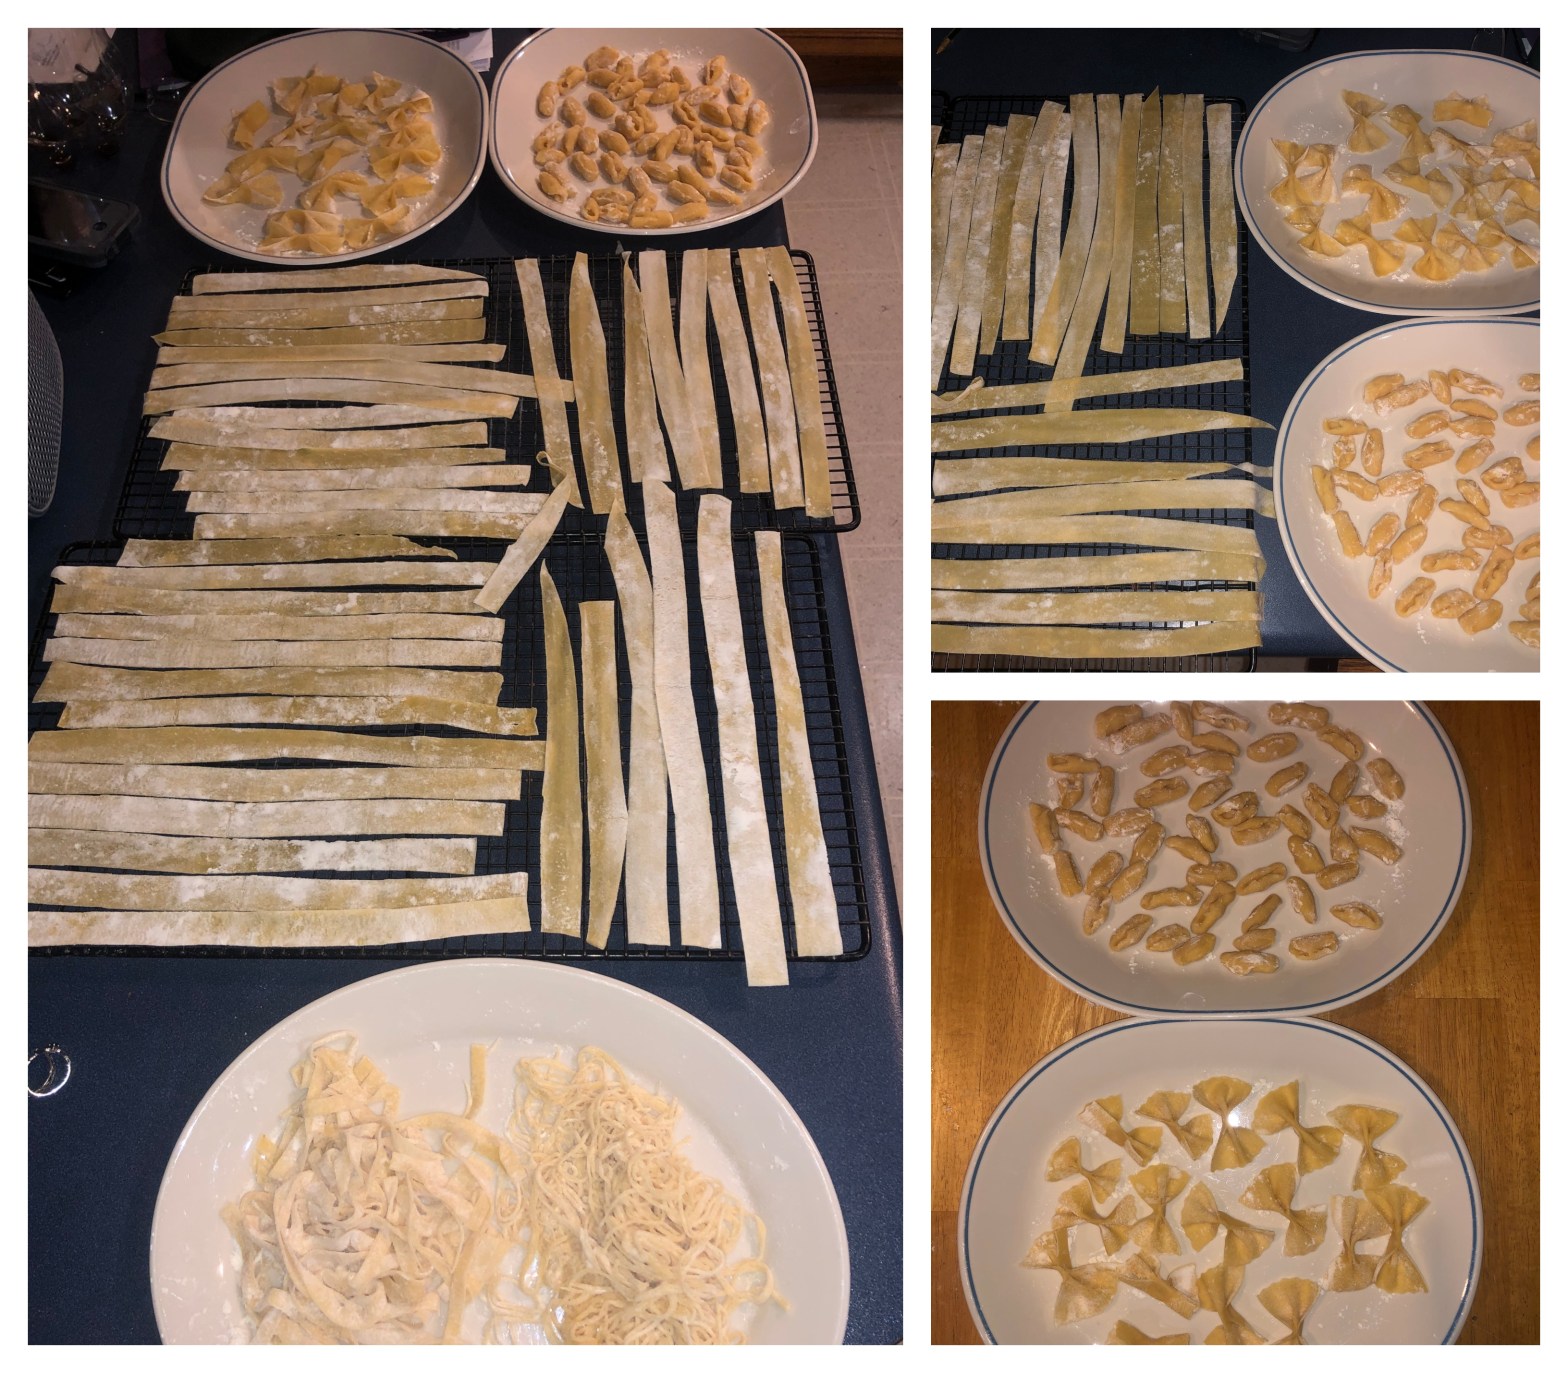
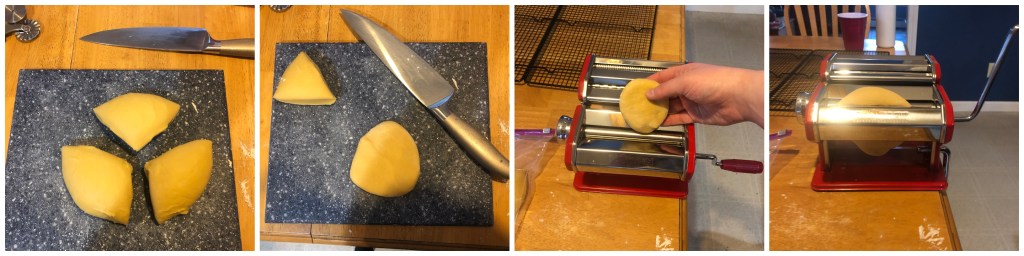
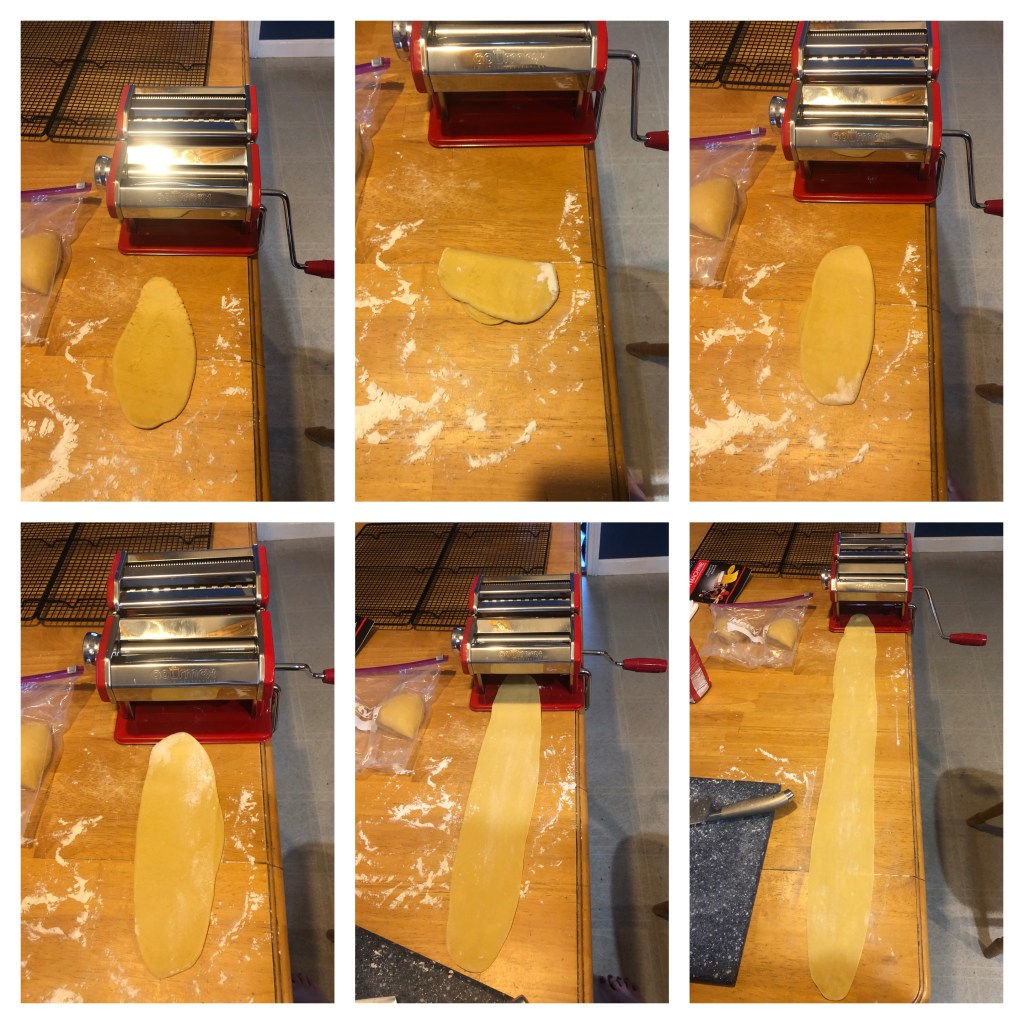
Finally, it was time to cut and shape the pasta! I separated one ball of pasta dough into three sections, one for each type of pasta I planned on making. Even though my new pasta maker would have made this part fairly easily, I wanted to experience cutting and shaping pasta by hand. I did however, use the pasta machine to roll out the thin sheets of dough I would need for two of the pasta types. To do this, I took one of the three sections, and split it in half again. I floured and flattened the dough before rolling it through the smooth rollers. Beginning with the thickest setting, I rolled the dough through a few times, folding it in half and flouring in between. Then, I rolled the dough through every setting, until reaching the second to last which resulted in the perfect thickness for my pasta.
The first type of pasta I attempted was a wide, one centimeter, hand cut pappardelle pasta. To make pappardelle, you have to first start with thin sheets of pasta dough. Also, I cut these sheets of dough in half or in thirds to keep the pasta from being too long. This type of pasta is cut after folding the dough together a few times. So, I made sure to heavily flour my sheet of dough, and I folded it together twice. Finally, I cut the folded dough into evenly spaced sections, then opened each small piece to reveal a long wide piece of pasta. I continued to prepare and cut the rest of the dough for this section, and I placed the finished pappardelle on a rack to dry.
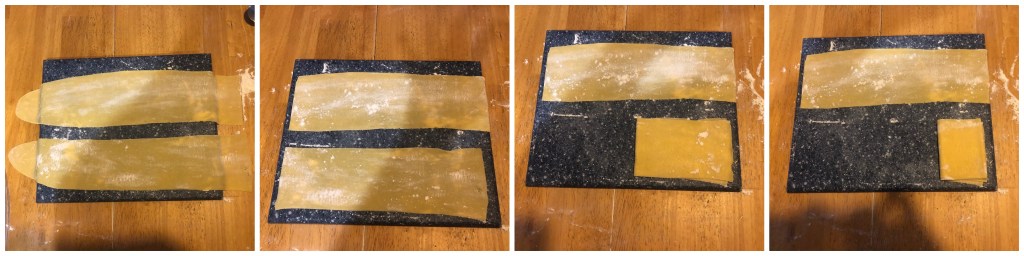
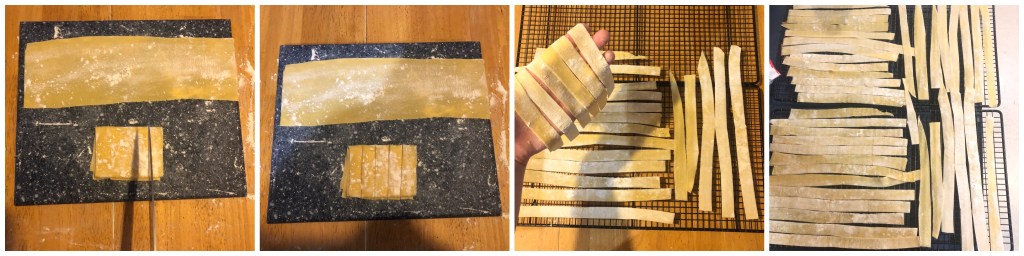
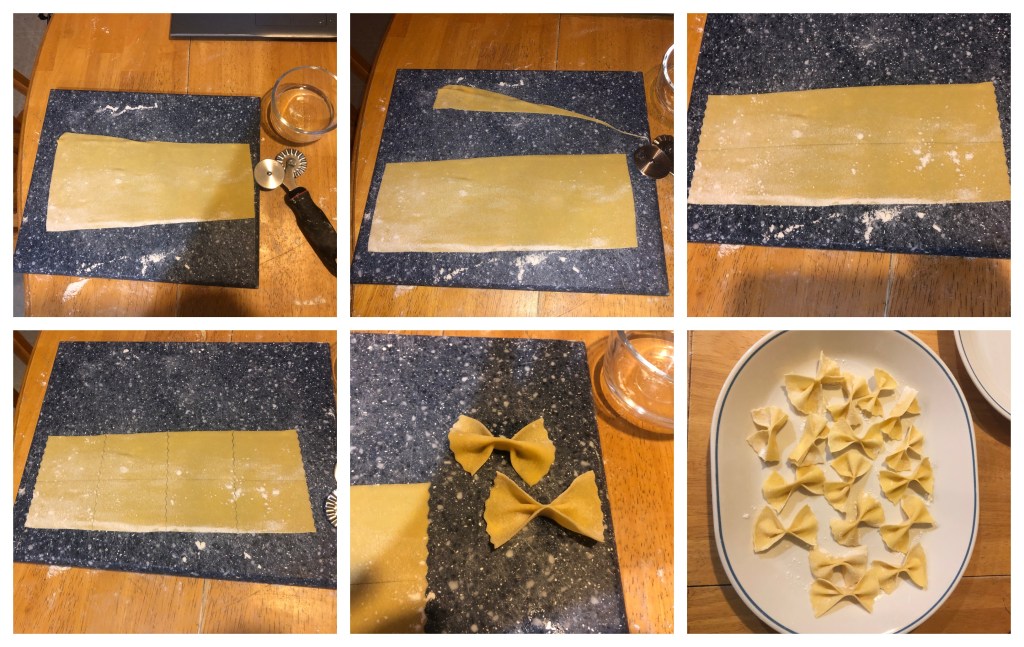
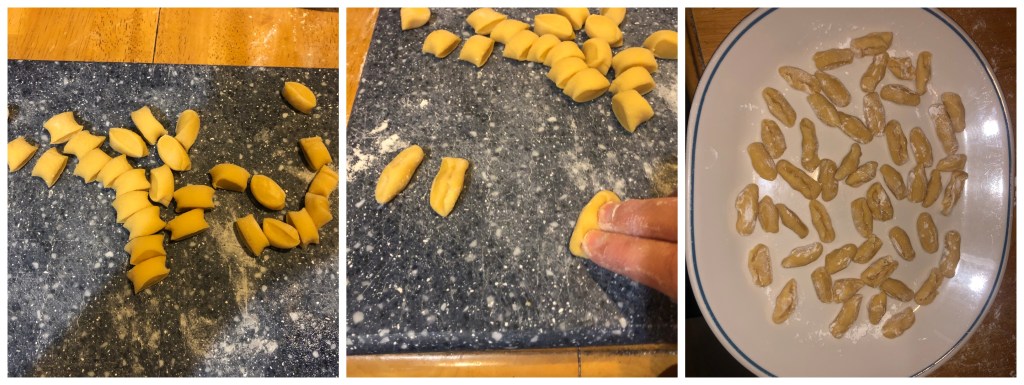
The next pasta type I attempted to make was farfalle, pasta that looks like bow ties or butterflies. Just like the pappardelle, farfalle starts out with a thin sheet of dough, that I cut in half. With one of the halves, I used the straight blade of my pastry cutter to cut the sheet into a rectangle. Next, I used the wavy blade of my pastry cutter to cut off the ends of the rectangle, as well as cut it into sections. For the last cut, I used the straight blade to cut the sheet in half the long way. Folding this type of pasta may seem intimidating, but I was able to figure it out just by looking at a picture. I continued cutting and folding my farfalle pasta for the other half of the sheet, then I placed them on a plate to dry.
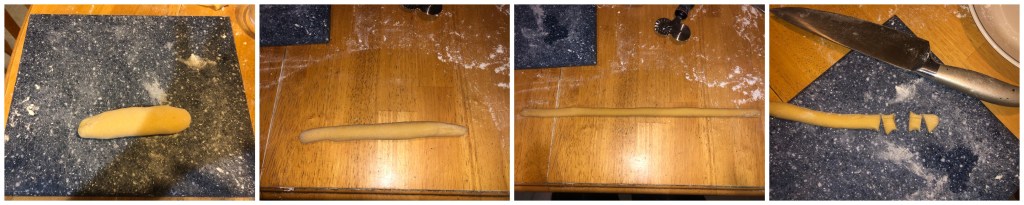
The last pasta type I attempted to make was cavatelli, which was completely different then the other two types. Cavatelli is a type of shell pasta that begins by rolling a piece of dough into a thin log or cylinder. The log or cylinder is then cut into roughly one centimeter pieces. Shaping this type of pasta was super easy. I placed two of my fingers on the top of a piece of dough, and dragged my fingers back until the pasta curled. These were definitely the most fun for me to make. I continued to use the rest of the pieces to make cavatelli pasta, then I placed them on a plate to dry.
Alright, I know this is a long blog post, but I promise I’m almost done.
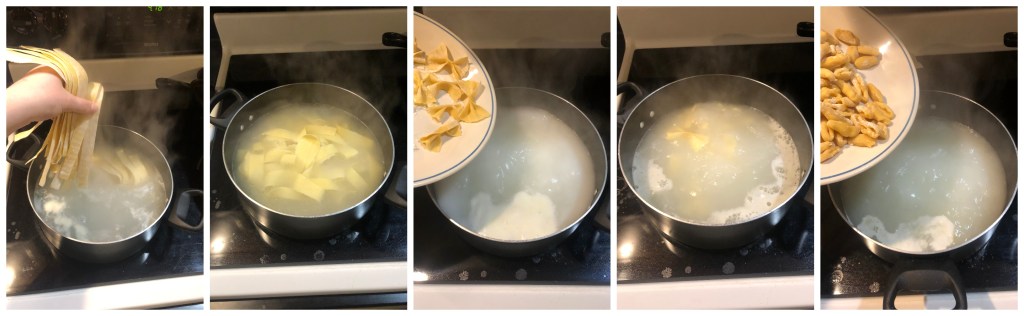
Since all three types of pasta were cut, shaped, and slightly dry, it was finally time to cook them. Fresh pasta is cooked exactly the same as any other type of pasta, by boiling water and adding salt. I cooked each type separately, and used tongs to remove the pasta from the water when they were done. The time it takes for fresh pasta too cook is only a couple minutes, if that. A good rule of thumb, and what I followed when cooking my pasta, is that when the pasta begins to float it is usually done. Once all three types were cooked, my family and I each made a plate with each type, and topped it with meat sauce.
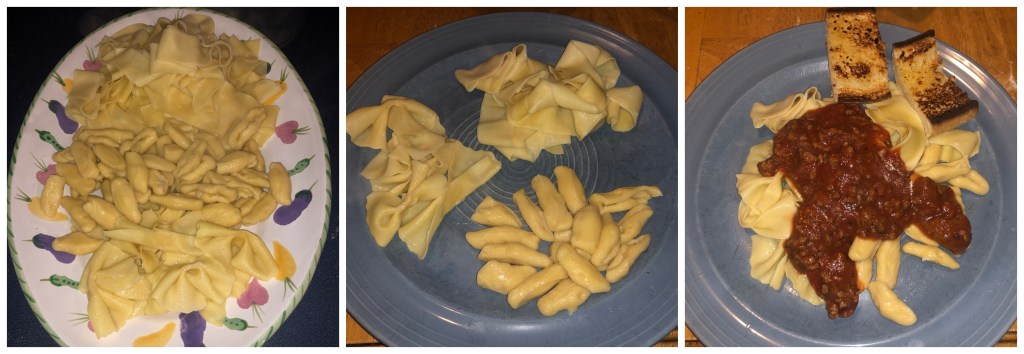
The best part of this experience was finally being able to eat my fresh pasta after a long day of preparing it. Overall, it was a wonderful experience, and I will definitely do it again!

I hope it was really good! I wish I was home so that I could have tried it with you guys! – emma
LikeLike