The “Italian Way” of Wine Making & Drinking

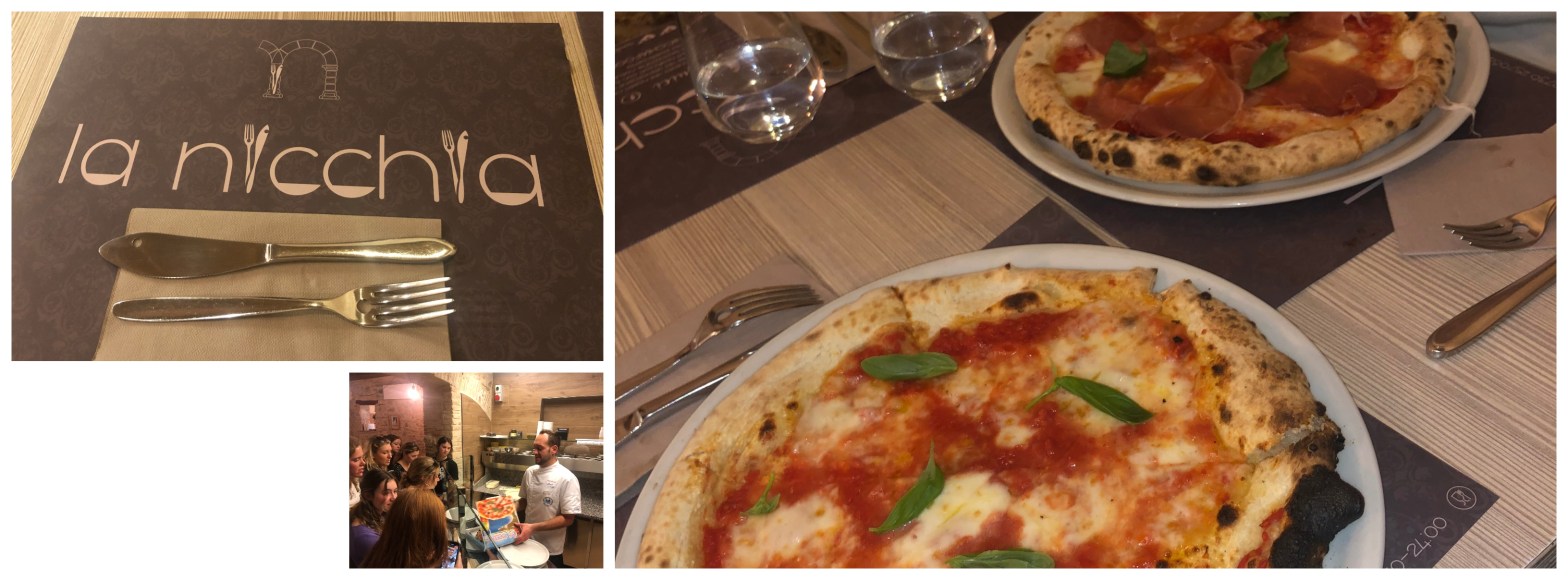
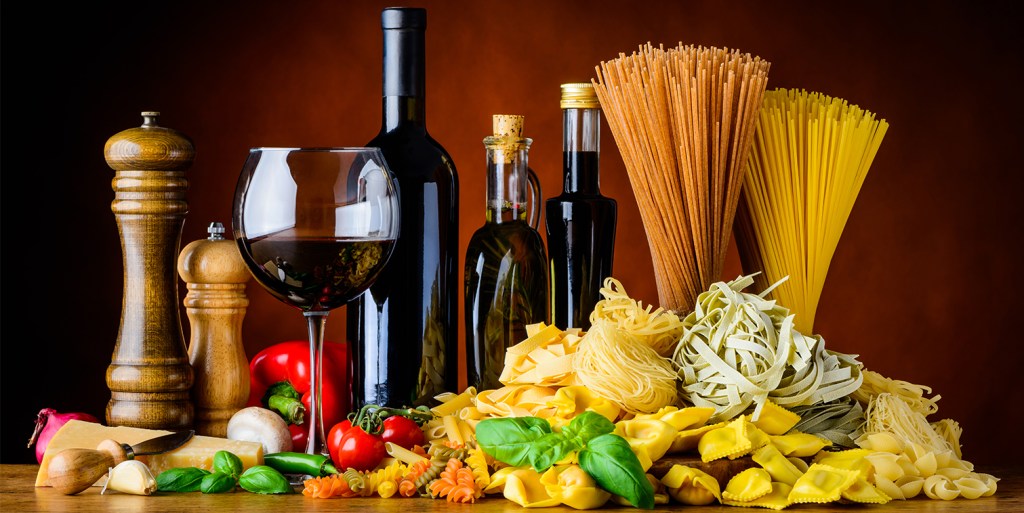
Most Italian’s perspective of wine is influenced by their culture, such as the history and traditions. The Italian culture focuses on art, family, architecture, music, and food. Within the Italian cuisine, wine is occasionally used as an ingredient for many classic dishes. Wine is also the drink of choice for many Italians! Wine is viewed as a significant part of Italian culture, and has been throughout its entire history. 

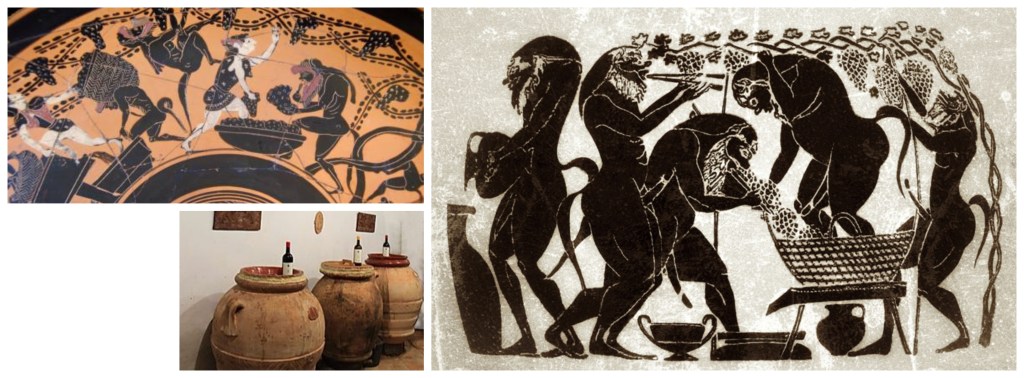
The Greeks are credited for introducing wine to Italy. Their everyday lives already included drinking and producing wine, which they continued to do when they settled throughout southern Italy. After the Greeks realized Italy was covered in fertile land, they brought over their vines, and began growing grapes. Italy’s rich soil and Mediterranean climate provided perfect conditions for their vines to grow. Eventually, the Greeks named their land Oenotria, meaning “land of wine”.

Etruscan civilization of Ancient Italy, and its influence on early ...

The Etruscans are a group of people that settled throughout central Italy. They used the grapevines introduced by the Greeks to begin producing their own wine. The wine making techniques used by the Etruscans are said to be “ahead of their time”. They would store crushed grapes in a clay container, and bury them in the ground. The cooler temperatures from the ground had a positive effect on the fermentation cycle. The Etruscan’s temperature controlled fermentation technique produced highly desirable wines. Unfortunately, the Etruscan civilization was conquered by the Romans. 

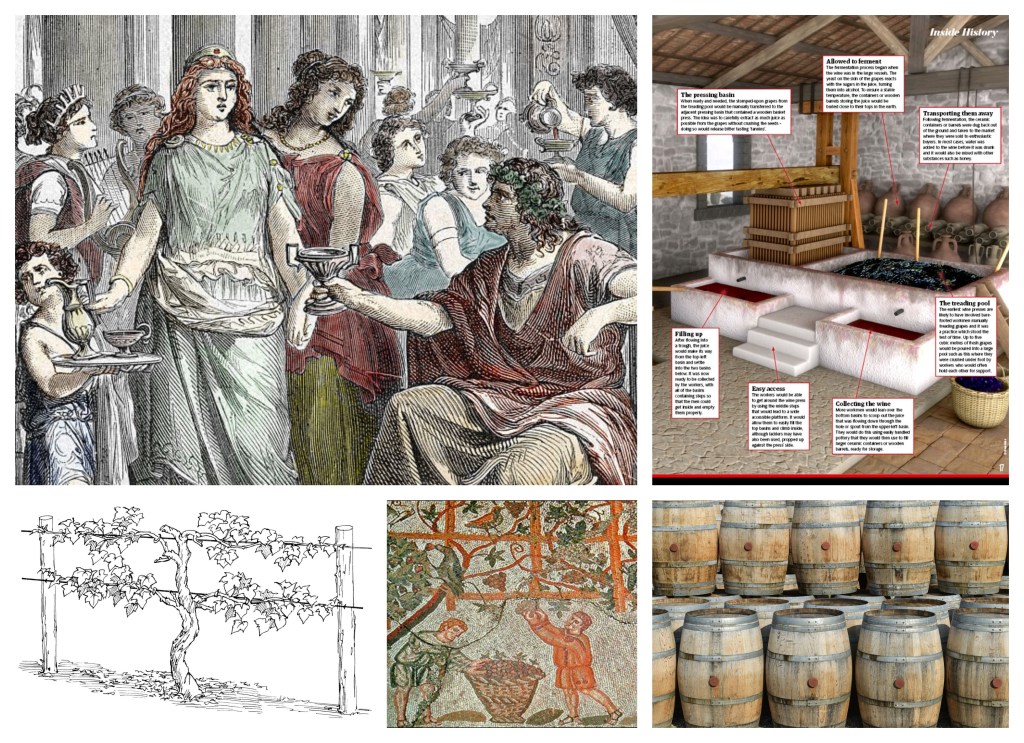
With the Roman Empire expanding, the market for wine also started to increase. The Romans began producing their own wine, which led to the importance of wine in the Roman society. Wine made in the Roman Empire was often mixed with water because the alcohol content was very high. Today, Italians would most likely cringe at the thought of adding anything extra to a glass of wine, but that is exactly what many Romans did. They would often mix their wine with honey, herbs, spices, salt, or even chalk. Despite their strange way of drinking wine, the Roman Empire became the leader of the wine industry. The Roman Empire started using trellises (structures that support the growth of vines), and they upgraded their wine presses to extract more juice. The Romans even began discovering which grape varieties thrived in which climate. By improving certain wine making processes, the Roman Empire was able to harvest larger amounts of grapes, and produce a higher quality wine. Also, the Roman Empire invented the wooden barrel, to hold a wine while it aged to perfection. Finally, they sold their wine throughout Europe, causing many regions to embrace and practice the Roman’s improved techniques. Sadly, the fall of the Roman Empire caused a decrease in the need for wine, which continued through the Dark Ages. The need and desire for wine increased once again during the Renaissance.

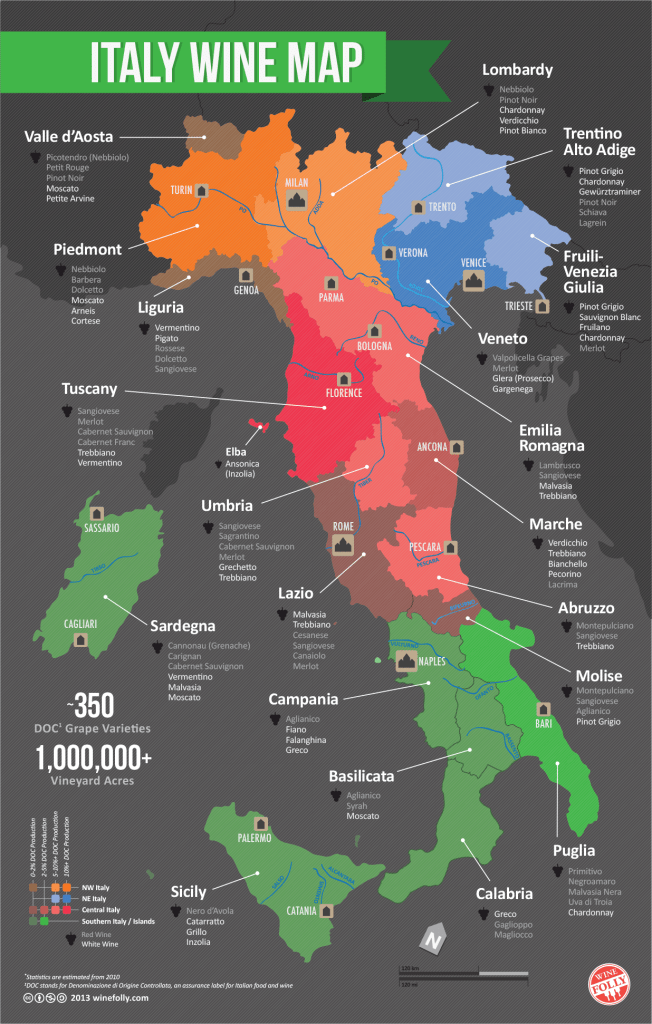
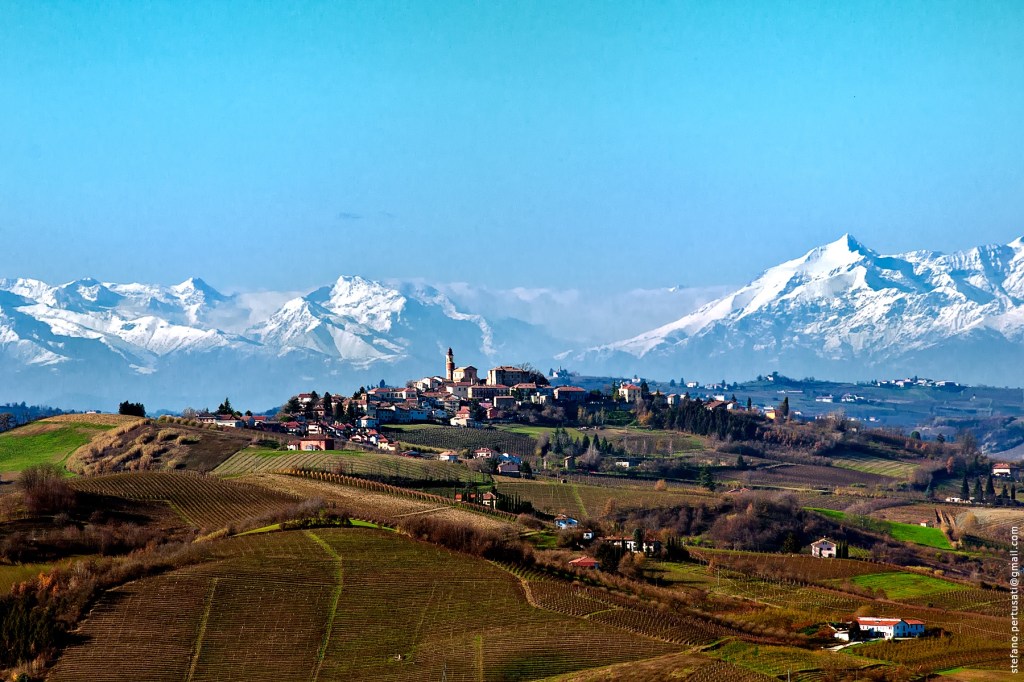
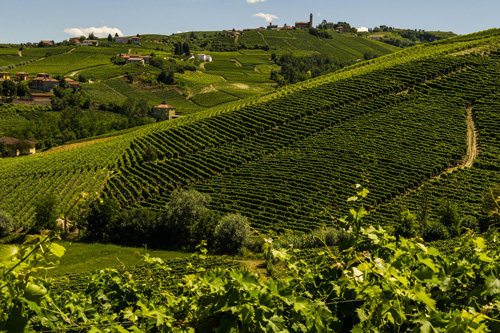
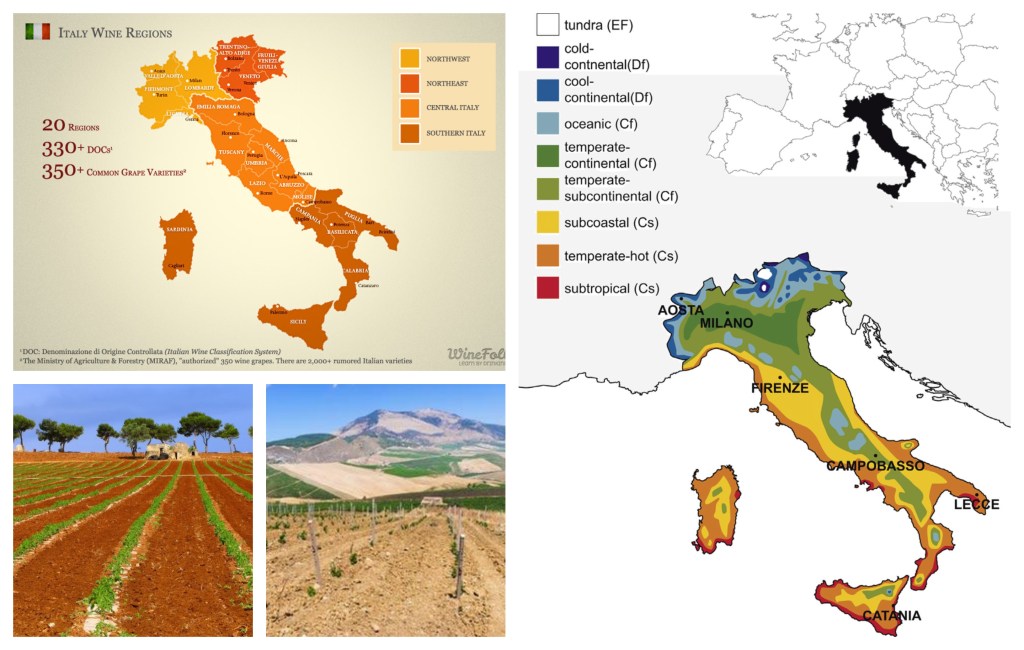
Today, Italy is the world’s largest producer of wine. Over 300 varieties of wine are made in Italy, throughout every region. The differences between each region, such as climate, soil, and regional traditions, can affect the production of wine. Italy experiences a Mediterranean climate, but that climate can vary in certain regions. Northern regions are known for their very hot, humid summers, and their cold, harsh winters. The central regions are more mild, and have smaller temperature differences between summer and winter. Their winters are less harsh, and shorter, resulting in a longer summer. The winters in the southern regions are normally mild and rainy. Spring, summer, and fall weather in the southern regions typically match, which results in a very long, hot, and dry summer. The soil found throughout Italy ranges from an acidic sand found on the northern mountains, to the practically unworkable clay found in Bologna and Tuscany, to the dry, chalky ground along the coast. Regional traditions describe the different varieties of grapes grown, and the unique types of wine produced in each region.

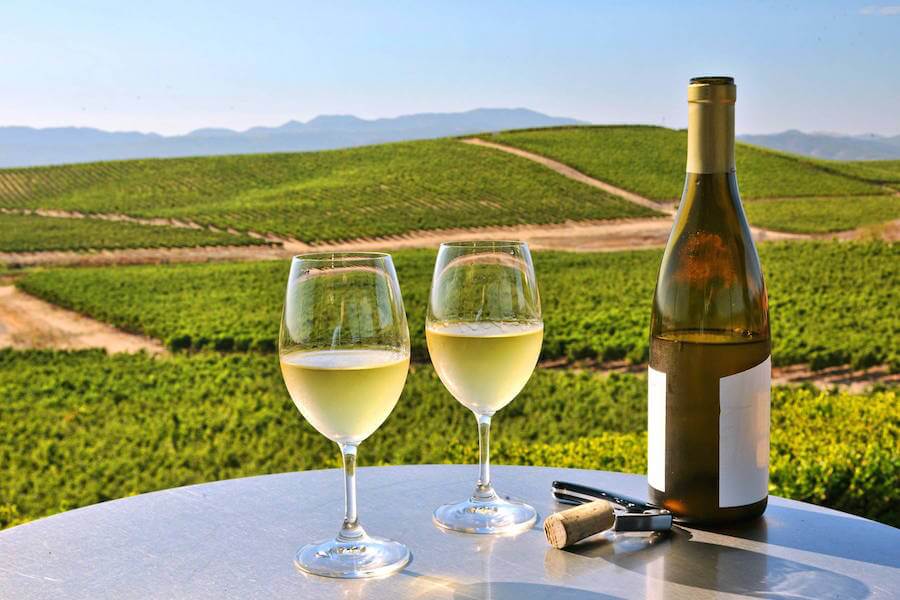
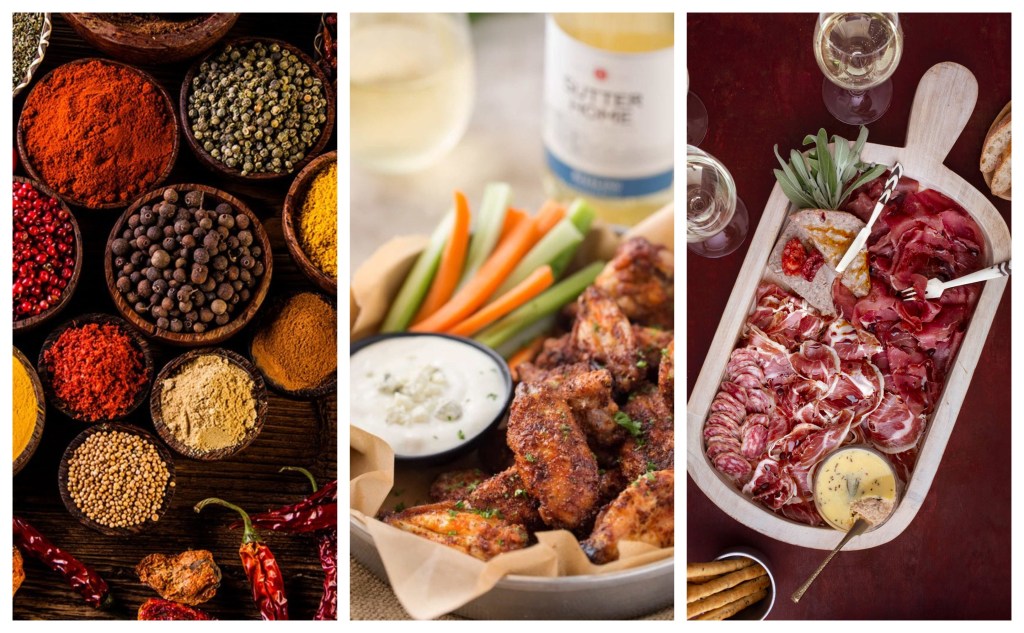
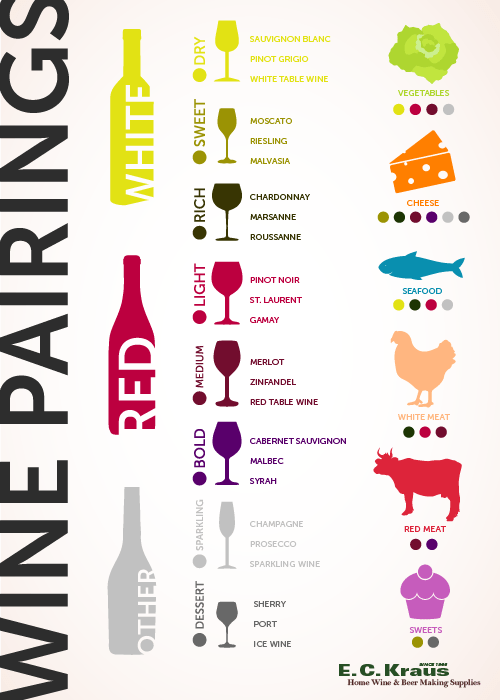
Almost always, Italians drink wine with food. If they are out at a bar, drinking with friends, they will receive a platter of cheeses, breads, meats, olives, and/or other vegetables. More commonly, a glass of wine is consumed during a meal, whether it is at home or in a restaurant. Italians enjoy pairing their wine to the food they are eating. The correct pairing can improve the overall taste of a dish, while enhancing the flavor of the wine.

Some Italian wines are poorly made, and some are of the highest quality possible. But, most wines are considered in between, or of good quality. With this being said, Italians do not view wine as a pretentious drink. They like to enjoy any and all qualities of wine, and will respect someone else for doing the same. 

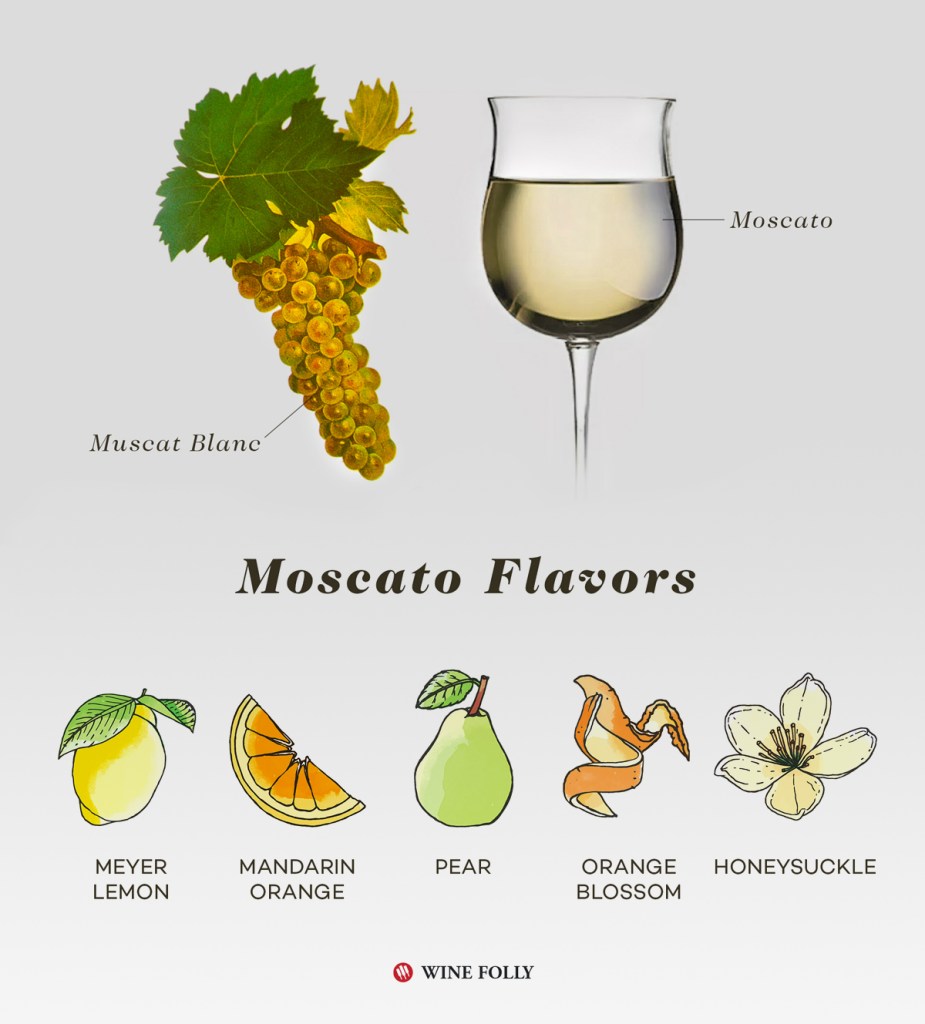
Unlike the United States, where wine can be found from anywhere in the world, Italians only drink wine they produced! Italy has a larger range of grape varieties than any country. With the many different types of wine being produced in every region, Italians believe they do not need to drink another country’s wine. 

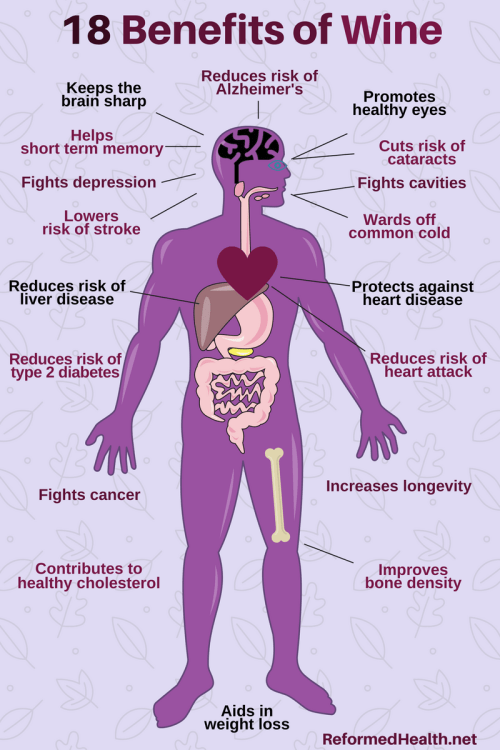
Wine is an essential part of the Mediterranean diet, and even has several health benefits. Resveratrol, a compound in wine, is associated with boosting heart health, protecting against some cancers, and preventing some types of vision loss. These health benefits, along with many others, are commonly found in populations around the Mediterranean Sea. Check out this website for all health benefits of wine: https://www.medicalnewstoday.com/articles/265635#benefits.

The “Italian way” of wine making and drinking is influenced by the history, traditions, techniques, and cultural significance of Italian wine. Wine in Italy has been around for thousands of years, and many Italians are proud of its long history. The traditions and techniques of wine making are essential to produce the various types of Italian wines. Finally, the cultural significance of wine is defined by how, when, and why Italians drink wine. 

New England Wine

Last week, I decided to switch things up by creating a presentation about a local winery, instead of writing a long blog post. You can view my presentation by clicking on the PDF file below!

I encourage you all to check out Squamscott’s online store, found on their website: https://www.blueheronwines.com/. I bought a bottle of their Seacoast Cranberry for $22, and it was delivered to my house two days later. Not only did the wine taste amazing, but I loved being able to support a local business during this time (and I didn’t have to leave my house)!

I hope you all enjoyed learning about Squamscott Vineyard and Winery as much as I did! Be on the lookout for my next blog entry about the “Italian Way” to wine making and drinking!

Moscato

Italy is recognized to have some of the oldest wine producing regions in the world. There are over 500 different varieties of Italian wine produced throughout the entire country, making Italy the world’s largest producer of wine. Some types of Italian wine are only produced in one region, but most can be found in multiple different regions.

Moscato is a popular type of Italian wine that is made from the Moscato grape variety. These grapes flourish in the Mediterranean climate, and can be found in several Italian regions. Each region produces a different style of Moscato with unique characteristics. Moscato grapes can also be several different colors, but are more commonly seen as “blanc”, or white. The northeast region Trentino Alto-Adrige is known for Moscato Rosa, a red colored wine with a spice and berry flavor, and Moscato Giallo, a golden colored dry wine with floral and spicy flavors. Pantelleria, a small island near Sicily is known for Moscato di Pantelleria, which is an amber colored wine with apricot flavor. The last two styles of Moscato are produced in the northwest region, Piedmont. Moscato d’Asti is a frizzante (slightly sparkling), golden colored sweet wine. The second style is Asti, a “fully sparkling”, less sweet version of Moscato d’Asti. Moscato d’Asti is the most popular and most recognizable style of Moscato. At most establishments, Moscato d’Asti is generally served to a customer if they ask for Moscato.

Moscato grapes

Mountainous terrain and valleys take up most of the land in Piedmont, leaving only 30% of the region available for vineyards. The warm Mediterranean climate and the colder weather from the Alps causes temperature variation, filling the entire region with a thick fog. Vineyards are planted along the hillsides because this fog takes all day to clear, which could limit the amount of sunlight hitting the ground. The Moscato grapes are often grown in the cooler vineyards.

View of Piedmont

Moscato grapes are one of the oldest grape varieties grown in Piedmont. But, Moscato d’Asti is a relatively new wine for the general public. Originally, winemakers would make this slightly fizzy wine for themselves to enjoy. It even gained the reputation of being a “winemaker’s wine”. They would often drink Moscato d’Asti during lunch because the low alcohol content did not impair their ability to do their jobs. Eventually, it became popular throughout Piedmont to consume this wine during long, multi course meals to cleanse their palate before each course, and also prepare their palette for dessert.

All styles of Moscato are known for being sweet, and easy to drink. The high sugar content and low amount of acid in Moscato grapes are responsible for the candy-like flavor. When smelling this type of wine, the floral and fruity notes are very prominent. Each individual note can be distinguished through a sip of wine. The common fruity flavors of Moscato are peach, apricot, orange and lemon, with floral scents of rose petal, elderflower, and honeysuckle.

Moscato d’Asti is the type of wine everyone pictures when they hear the word “Moscato”. It can sometimes be difficult to pair this wine with main courses because of the level of sweetness. But, when served with appetizers, sweet brunch dishes, dessert, or even alone, it is perfect. The key to pairing wine with food, is to choose opposing flavor profiles. For example, Moscato d’Asti would pair perfectly with anything hot and spicy, such as Indian curries, or buffalo chicken wings. Also, a high alcohol content has been known to increase the level of spiciness. So, the low, 5% alcohol content in Moscato d’Asti could help calm burning sensations when compared to 12% alcohol content commonly found in other wines. Cured meats like prosciutto, and salami have a high salt content, and can be paired with the wine to balance sweetness. Brie and Camembert, two soft, creamy cheeses can be paired with Moscato d’Asti without overwhelming the fruit profiles. A plate of crunchy raw carrots, celery, cucumbers, and radishes complements the light bubbles in the wine. Any kind of fruit dessert, and pancakes or waffles topped with fruit and whipped cream would accompany the fruit flavors in Moscato d’Asti excellently.

Spices, spicy food (buffalo chicken), cured meat.
Soft cheeses and vegetable plate.
Fruit pie, pancakes, and fruit.

There are a ton of different wineries that produce Moscato wine within the region of Piedmont. But, one winery in particular focuses on Moscato, by dedicating most of their vineyards to growing Moscato grapes. Saracco is located in Castiglione Tinella, known as the “heart of the Moscato d’Asti”, within the Province of Cuneo. This winery has been producing Moscato wines since the early 1900s. Saracco only produces five different types of wine, and the most popular are the two Moscato wines. When it comes to growing grapes, the soil is very important to Saracco. Their land is made up of sand, silt, and limestone, which they believe to be ideal for enhancing the aroma of Moscato d’Asti. For more information about Saracco, please visit their website: http://paolosaracco.it/en/!

The vineyards at Saracco.

Health Benefits of Olive Oil!

The Mediterranean Sea is surrounded by a ton of different cultures, and almost all of them share a similar way of eating. This diet, known as the Mediterranean diet, focuses on high intakes of fruits, vegetables, whole grains, beans, nuts, seeds, and most importantly olive oil. Luckily for them, olive oil is one of the healthiest types of oil!


Olive oil can be made into a few types, such as virgin olive oil, refined olive oil, olive pomace oil, lampante oil, and extra virgin olive oil. The process for each type can be completed in different ways, which ultimately changes the flavor of the oil, as well as the composition. As a result, some oils are considered of better quality than others.


The highest quality type of olive oil is extra virgin olive oil. To be classified as “extra virgin”, an oil must meet several specific standards. When producing extra virgin olive oil, only olives harvested in the past 24 hours should be used. This will ensure that the final product is free from any defects, at least those related to lack of freshness. The oil has to be extracted without the use of chemicals, mechanical means, and/or excessive heat. This method of extraction is the reason extra virgin olive oil has a distinct taste and chemical composition; it also does not alter the final product’s nutrient and vitamin content.


Olive oil is packed full of important nutrients and benefits, making it one of the healthiest types of oil. But, out of all five types, extra virgin olive oil stands out the most. Unlike the other four types, extra virgin olive oil is not refined during production, so most nutrients are not removed. All of the nutrients are then associated with many different health benefits. Therefore, consuming any type of olive oil, but more specifically extra virgin olive oil, will have a positive effect on the body.


Extra virgin olive oil is a healthy source of dietary fat. Both saturated and unsaturated fats are present in extra virgin olive oil. Saturated fat is not necessarily a “bad” fat, but it can be considered undesirable, especially when consumed in large quantities. Luckily, only a small percentage of extra virgin olive oil is made up of saturated fat. Unsaturated fat is considered healthy, or “good”. This healthy fat can be separated into two groups, monounsaturated and polyunsaturated. Extra virgin olive oil contains both groups of fat, but the majority is monounsaturated. Extra virgin olive oil can also be a source of a couple vitamins! Vitamin K is essential in blood clotting, bone metabolism, and regulating blood calcium. Vitamin E is important in vision, reproduction, and the health of blood, brain, skin. Also, vitamin E acts as an antioxidant by protecting the body’s cell from damage.


Eating a diet full of healthy fats can be very beneficial for a number of conditions and diseases. The addition of extra virgin olive oil to a diet is often associated with a lower risk of developing heart disease and/or having a stroke. The large concentration of monounsaturated fat in extra virgin olive oil is able to lower the level of bad (LDL) cholesterol, which then lowers the occurrence of blood clots. Also, monounsaturated fat can sometimes lower blood pressure, and reduce inflammation.


The regions around the Mediterranean sea consider olive oil an essential part of their diets. The population around this area even has a higher life expectancy. This means a high fat diet could be the key to living a better, longer life.

*** I apologize for the lack of pictures. Every time I tried to add a picture my laptop would tell me there was an “error in the upload” ***

Sources:

https://www.healthline.com/nutrition/11-proven-benefits-of-olive-oil#section13

https://www.medicalnewstoday.com/articles/266258#tips

https://www.webmd.com/food-recipes/features/olive-oil-health-benefits#1

https://www.extravirginspain.com/the-different-types-of-olive-oil.html

Preparing Fresh Pasta at Home

Have you ever wanted to make fresh pasta at home? I know I have! And this weekend I was finally able to. The pasta dough was very easy to throw together, and only required two ingredients that are commonly found in most kitchens. The most challenging part for me was cutting and shaping the pasta. It was occasionally frustrating, and a little time consuming (so beware), but in the end I was able to expand my culinary skills by learning how to create different pasta shapes by hand.

Pasta can be prepared without the use of very many tools. In fact, basic pasta making only requires a smooth surface, a rolling pin and a knife. A smooth surface is needed throughout the entire process, as it provides a spot to mix, knead, roll out and cut the pasta dough. A rolling pin flattens out the dough to whatever thickness is needed, which then prepares the dough to be cut by a knife into many different pasta shapes. But, a typical Italian would most likely use a few more items, including a wooden board (or wooden table), a kitchen scale, a dough scraper, and a pastry cutter. A wooden surface is better than one made of metal or granite because the dough is less likely to stick to wood. If the dough is too wet and sticky, then a dough scraper can come in handy to remove the dough from the surface. A kitchen scale could prevent wet and sticky dough by providing a more accurate measurement of the ingredients, resulting in the perfect pasta dough. Finally, a pastry cutter serves the same purpose as a knife, but often has a wavy blade that can give pasta a different look and shape. They are all very easy to acquire (if you don’t already have them in your kitchen), and they are all very easy to use. These main six tools provide a starting point for the process of pasta making, but the process can be made easier and less time consuming by using additional tools or equipment.

Ravioli makers are a lifesaver if you are a beginner at pasta making. Typically, ravioli is made by rolling dough into thin sheets, then placing a dollop of filing onto one side. After moistening the dough with water, the other half of the sheet is folded over the filling, and then pressed together around each dollop. Finally, the now ravioli is cut into squares. Making ravioli by hand is not a very difficult process, but it can take time for someone to perfect and complete in a reasonable amount of time. This is when a tool that makes the process easier is welcomed. To use a ravioli maker the dough still needs to be rolled into thin sheets. Then, one sheet of dough is placed on the base of the ravioli maker, which is very similar to an ice tray. A plastic mold is gently pressed on the base to make small pockets in the dough. Next, the filling is added to the pockets, and another sheet of dough is added on top. A rolling pin is used to flatten out the dough until the ridges of the base are visible. Finally, the base can be flipped over and the dough can either be pulled apart or cut into individual pieces. Basically, if someone is not familiar with making ravioli then a ravioli maker can simplify the somewhat challenging process, and produce a more appealing, uniform ravioli.

Drying racks and drying nets can be very helpful after pasta is cut. A drying rack normally holds long types of pasta, and a drying net is normally used for filled pastas. Once the pasta is cut, it would be placed onto either of these tools to dry slightly, and develop a “skin” on the exterior. Both of these are very helpful by preventing pasta from sticking to itself or all together.

What would you say is the most well known tool used in the pasta making process? A pasta maker! Which is often complete with smooth rollers on one side to flatten the dough into sheets, and different style pasta cutters on the other side. The two sides to the pasta maker can simplify two completely different steps. Instead of using a rolling pin to flatten out the dough, the smooth rollers can be set to a range of different thicknesses, which can easily create sheets of dough almost in one pass. The different style pasta cutters on the opposite side typically cut fettuccine and thin spaghetti. One pass with a sheet of dough can cut about a handful of pasta. A pasta maker simplifies preparing fresh pasta by having the ability to complete two different steps in one tool, and doing so in a less amount of time.

For other tools that could make preparing fresh pasta easier, check out this article: https://nymag.com/strategist/article/essential-pasta-making-tools-gear.html!

When preparing my fresh pasta this past weekend, I used a few of the tools I mentioned earlier. The whole process was completed on a smooth wooden surface, my kitchen table. First, I used a kitchen scale to measure my ingredients. Then, I had to use a dough scraper to help mix my ingredients together. I also used a knife to cut my pasta dough into smaller sections, and a pastry cutter to make a certain style of pasta. The last and best tool I used was a pasta maker (I bought one on Amazon just for this).

Making the pasta dough was the easiest part of my whole day because all it entailed was mixing flour and eggs. I spent quite a bit of time online looking for a pasta recipe. They were all fairly similar, except some had an addition of olive oil and salt. At first I unsure of what recipe to actually follow, until I remembered the pasta shop I visited in Italy, and they only used two ingredients: flour and eggs. I was even able to buy 00 flour (another Amazon buy), which is a very common type of flour used in Italy. The recipe for pasta is only 400 grams of flour and 4 eggs (each at least 70 grams). I decided to double this recipe, so I could freeze it and enjoy it another day.

First, I used my kitchen scale and measured 800 grams of flour (normally 400 grams but I am doubling the recipe). After, I dumped the flour into a nice pile onto my kitchen table, and started cracking eggs. Each egg should be around 70 grams, but the eggs I used were only around 50 grams, so I had to use 11 eggs total.

Now back to the pile of flour. Instead of mixing the dough in a bowl, you typically mix it on the table. To do this, you have to create a “well” in the pile of flour for the eggs. Once the eggs are in the “well”, you have to slowly begin incorporating everything together. For me, this was extremely messy, and I was getting egg everywhere. But, I used the dough scraper and everything started slowly coming together.

I decided to split my dough into two sections before kneading it, and I believe that made the dough slightly easier to work with. After kneading each half for roughly ten minutes, I placed both halves into a plastic bag, and let it rest for 15-30 minutes.

Finally, it was time to cut and shape the pasta! I separated one ball of pasta dough into three sections, one for each type of pasta I planned on making. Even though my new pasta maker would have made this part fairly easily, I wanted to experience cutting and shaping pasta by hand. I did however, use the pasta machine to roll out the thin sheets of dough I would need for two of the pasta types. To do this, I took one of the three sections, and split it in half again. I floured and flattened the dough before rolling it through the smooth rollers. Beginning with the thickest setting, I rolled the dough through a few times, folding it in half and flouring in between. Then, I rolled the dough through every setting, until reaching the second to last which resulted in the perfect thickness for my pasta.

The first type of pasta I attempted was a wide, one centimeter, hand cut pappardelle pasta. To make pappardelle, you have to first start with thin sheets of pasta dough. Also, I cut these sheets of dough in half or in thirds to keep the pasta from being too long. This type of pasta is cut after folding the dough together a few times. So, I made sure to heavily flour my sheet of dough, and I folded it together twice. Finally, I cut the folded dough into evenly spaced sections, then opened each small piece to reveal a long wide piece of pasta. I continued to prepare and cut the rest of the dough for this section, and I placed the finished pappardelle on a rack to dry.

The next pasta type I attempted to make was farfalle, pasta that looks like bow ties or butterflies. Just like the pappardelle, farfalle starts out with a thin sheet of dough, that I cut in half. With one of the halves, I used the straight blade of my pastry cutter to cut the sheet into a rectangle. Next, I used the wavy blade of my pastry cutter to cut off the ends of the rectangle, as well as cut it into sections. For the last cut, I used the straight blade to cut the sheet in half the long way. Folding this type of pasta may seem intimidating, but I was able to figure it out just by looking at a picture. I continued cutting and folding my farfalle pasta for the other half of the sheet, then I placed them on a plate to dry.

The last pasta type I attempted to make was cavatelli, which was completely different then the other two types. Cavatelli is a type of shell pasta that begins by rolling a piece of dough into a thin log or cylinder. The log or cylinder is then cut into roughly one centimeter pieces. Shaping this type of pasta was super easy. I placed two of my fingers on the top of a piece of dough, and dragged my fingers back until the pasta curled. These were definitely the most fun for me to make. I continued to use the rest of the pieces to make cavatelli pasta, then I placed them on a plate to dry.

Alright, I know this is a long blog post, but I promise I’m almost done.

Since all three types of pasta were cut, shaped, and slightly dry, it was finally time to cook them. Fresh pasta is cooked exactly the same as any other type of pasta, by boiling water and adding salt. I cooked each type separately, and used tongs to remove the pasta from the water when they were done. The time it takes for fresh pasta too cook is only a couple minutes, if that. A good rule of thumb, and what I followed when cooking my pasta, is that when the pasta begins to float it is usually done. Once all three types were cooked, my family and I each made a plate with each type, and topped it with meat sauce.

The best part of this experience was finally being able to eat my fresh pasta after a long day of preparing it. Overall, it was a wonderful experience, and I will definitely do it again!

Olive Oil Tasting

Olive oil is an essential part of the Mediterranean diet. The abundance of olive trees and the versatility of this oil are two reasons for the high popularity in Italy. The traditional olive oil process began by handpicking olives. This was because producing olive oil is a delicate process, and damaging the olives in anyways could alter the taste of the end result. Once picked, the olives were washed to remove any unwanted materials. Next, the olives were crushed into a paste with large granite stones, in order to release the oils. The paste was then mixed for a certain amount of time to allow for the oil droplets to combine. Finally, the olive paste was spread onto disks and pressed in a hydraulic press. This released both oil and water, which would later be separated.

Modern olive oil processing is similar to the traditional process, except now there is the use of machines for some steps. Instead of handpicking, olive farmers use a “shaker” that sends vibrations throughout a tree which causes the olives to drop onto a net. This allows for a larger amount of olives to be picked at once. The granite stones that used to crush the olives were replaced with metal crushers that are able to work at fast speeds. Large vats that can control the speed and temperature of the olive paste are now used for the mixing process. The last step of modern olive oil processing is the most advanced because it relies solely on the use of a machine. The olive paste is no longer placed onto disks and pressed, but is added to an industrial decanter that uses centrifugation to separate the water and pulp from the olive oil. Check out this link: https://phys.org/news/2015-05-olive-oil.html, for more information about both of these olive oil processes!

Olive oil tasting is actually very similar to wine tasting because of the large variety of flavors and aromas that each could possess. Before my classmates and I began the actual tasting, we were offered a firm green olive and a squishy/wrinkly black olive. Most people did not mind the taste, but in my opinion they were terrible. Also, we were all given a couple sheets of paper that would eventually help us assess each oil. The first sheet we were given had a list of the main positive attributes and the main negative attributes (defects). The second was a profile sheet that is used by the International Olive Oil Council (IOOC) to assess the quality of an oil. This profile sheet lists several defects and a few positive attributes, with a scale next to each. If a taster perceives a defect or positive attribute, they mark the intensity along the corresponding scale.

The IOOC profile sheet and the positive and negative attributes worksheet.

For this tasting, my classmates and I sampled and assessed three different olive oils of three different qualities. Two of the oils were of good quality, one of which was slightly better, and the last oil was considered to be of poor quality. We were given three small cups labeled one through three, as well as a water cup and an empty cup to spit the oil in. A sample of each oil was poured into one of the three small cups; the identity of each oil was unknown to my classmates and I.

A sample of oil in each cup.

Alright, now it’s time to discuss the fun part! The first step in olive oil tasting is to slightly warm up the oil. My classmates and I started with the small cup labeled “1”. We all placed this cup into the palm of one hand, and used our other hand to cover the top. Then, we twisted the cup between our hands to warm the oil which released certain aromas that we might have missed before. As you all probably could have guessed, the next step was to smell the oil. After, everyone tried to guess what exactly they were smelling. There were a lot of wrong answers, including mine (I thought I was smelling garlic), but I believe a couple of my classmates guessed correctly. The main aroma of olive oil #1 was grass. Next, it was finally time to taste the olive oil. My classmates and I took a small sip, swished it around our mouths, then inhaled sharply. When performing an olive oil tasting, drawing in air with each sip helps to heighten the flavor. We were all warned to not swallow the olive oil because it can be very gross to “drink oil”. It is common with olive oil tastings to spit out the oil when you are done. After everyone spit out the oil, it was time to assess what exactly everyone tasted. We worked our way through the profile sheet, and discussed if we tasted any defects and/or positive attributes. Before we were able to move on to the other tastings, we had to eat a slice of apple to cleanse our pallet. The next two olive oil tastings followed the same procedure as the first one.

Tasting each sample of oil.

It was determined that olive oil #1 did not have any defects, and the positive attributes were grass (mentioned before when we first smelled it) and tomato. Olive oil #2 also did not have any defects, and the positive attributes were sweet and almond. Finally, olive oil #3 did not have any defects, but it also did not have any overwhelming positive attributes.

After all three olive oils were assessed, it was time to reveal their identities. The first olive oil can be found in a fourth liter bottle for nine euros. The second olive oil can be found in a half liter bottle for ten euros. The third olive oil can be found in a one liter bottle, at any grocery store, probably for three to four euros. With all that being said, the first two olive oils were of good quality, the first one was of slightly better quality, and the third oil was considered of poor quality.

Better, good, and poor quality olive oil.

As most of you all probably know by now, my study abroad experience was cut short due to the spreading of coronavirus. This blog post is the last one about a field trip or experience that I went on or had in Italy. I am continuing the classes I started as online classes, including the one this blog is for. So, from now on my posts will be written based on what I am asked to research each week. I promise to try and keep it entertaining! My next blog post will be about pasta, more specifically “preparing fresh pasta at home”. Instead of just boring you all with a bunch of research, I plan on making my own pasta, and teaching you all how to do it too! I hope you’ll enjoy it! 🙂

Making Sourdough Bread

This past week, my class and I had the opportunity to visit a local bakery. L’assalto Ai Forni is located on the ground floor of a beautiful building, but before it was a bakery, it was the home of the owner, Lorenza for many years. Sadly, an earthquake in 2016 caused the whole building to be deemed uninhabitable. Determined to bring the building back to life, Lorenza renovated and transformed part of it into the bakery that stands there today.

Lorenza doesn’t use brewers yeast to make her bread, instead she uses a sourdough starter. She prepares the sourdough starter herself, which is a mixture of just flour and water that is then left to ferment. For more information about the fermentation process of sourdough, check out this link: https://bakerpedia.com/processes/sourdough/! Lorenza also prefers to use ancient grain flour, instead of regular flour. Since ancient grain flour has not been genetically modified, it results in a more nutritious and more fragrant flour. She supports the local companies and farms around her by buying all of the flour she needs from them.

Bucket of sourdough starter.

Finally, my class and I were able to make our own loaves of sourdough bread! The recipe is very easy, and only technically requires two ingredients. First, we weighed 450 grams of ancient grains flour and added it to our bowl. Second, we measured 300 grams of lukewarm water and added it to the flour. Next, we mixed the flour and water together by placing our hand in the center of the bowl and making a circular motion until evenly combined. Our dough then had to sit for about 30 minutes to allow for the gluten network to develop.

Adding the flour and water.

The last ingredient that we needed to add to our dough was the sourdough starter. I mentioned this before as well, but this was made by fermenting a flour and water mixture. The amount of sourdough starter needed for a recipe is determined by taking a percentage of the flour. Our recipe needed the amount of sourdough starter to equal 30% of the flour, which was 135 grams. After our dough was fully mixed we placed them aside for Lorenza to bake in the morning.

Adding the sourdough starter.

After all the hard work we put into preparing our sourdough bread, it was finally time for some lunch! Lorenza and her team prepared a few of their most popular pizzas for us to try! The pizzas included a wide range of toppings such as potato and artichoke, salami and arugula, mushroom and cheese, and tomato sauce and sauteed greens with mozzarella cheese. It was all very tasty, and I will definitely be going back for more!

The delicious pizza they made for us!

Thank you so much L’assalto Ai Forni for teaching us all about sourdough bread!

Group photo and my loaf of sourdough bread!

Pizza Making

Last week, my classmates and I had the opportunity to make Napoletana pizza (also known as Neapolitan pizza) at La Nicchia Ristorante & Pizzeria! This type of pizza must follow a few guidelines to be considered “authentic”, such as type of flour, the preparation, the ingredients used, and the type of oven used. The pizza dough must be prepared with 0 or 00, which are very refined types of flours. After the dough is made it has to rest, then it must be kneaded and shaped by hand. The oven must be a wood fired brick oven. The pizza will be baked in this oven at a temperature of 800-900 degrees Fahrenheit for around 90 seconds. For more information about the guidelines, as well as a little history of Napolentana pizza, check out this link: https://bodrumnyc.com/naples-and-pizza-the-story-behind-neapolitan-pizza/.

The chef is showing us how to knead the pizza dough.

It was time to get to work! The chef told us the recipe for the pizza dough (included at the end of this post). First, the flour and yeast mixture is mixed in a bowl with water. Then, salt and extra virgin olive oil (we were told if you don’t have extra virgin, don’t even bother making pizza) are added in. The dough can then be dumped onto the table. After kneading the dough, it has to rest for at least three hours. Everyone in my class was able to make their own pizza dough, but instead of waiting for it to rest we got to take it home!

The chef is kneading the pizza dough.

The next step was shaping the pizza dough that the chef had already prepared for us! Shaping the dough was the trickiest part because it is all done by hand. The dough ball is first placed on a table completely covered in corn meal. Then, using our fingertips we had to press the dough into a thin circle. Next, we folded the dough over one hand to pick it up. As it was draped over our hand, we gathered the corn meal into a mound, and placed the dough on top of the mound. We flattened our hands on top of the dough, making sure our fingertips are about an inch away from the edge. Using a motion consisting of stretching and rotating, the dough began to form into a thin circle with a thick edge. After the shaping was completed, it was picked up and dusted off.

The chef is shaping the pizza and adding the toppings.
The chef is placing a pizza into the oven.

Then it was time for toppings! I chose the traditional margherita pizza, but La Nicchia had a huge selection of pizzas to chose from. Once the tomato sauce and mozzarella cheese were added, it was time to cook! My pizza was placed into the 800-900 degree Fahrenheit wood fired brick oven for about 90 seconds. The last step in making my pizza was adding fresh basil to the top. Finally, it was time to eat and enjoy!

My pizza!

Pizza Dough Recipe

  • 500 grams of 0 or 00 flour
  • 300 grams of water
  • 1 gram of yeast (or 3 grams of wet yeast)
  • 10 grams of extra virgin olive oil
  • 10 grams of salt

*Rest dough for at least 3 hours.

**To make at home: place oil on pan and cook at highest oven temperature for about 25 minutes.

My classmates and I were featured on their Instagram!

Thank you La Nicchia for teaching us how to make amazing Napoletana pizza!

Design a site like this with WordPress.com
Get started